Three Bean Turkey Chili

Three Bean Turkey Chili

IMG_0816

Sorry for the long gap in posts everyone! Midterms and some family emergencies got in the way…such is life! Although it is definitely feeling like summer here in California (because winter never came), comfort food is always a staple in this house. That includes chili!! So here it is folks, my Three Bean Turkey Chili that I’ve been making for years.

Ingredients:

1lb ground turkey

1 small yellow onion (diced)

A few cloves of garlic (minced)…or like 6 if you like garlic as much as I do!

3 cans of beans (drained and rinsed) – I usually use kidney, cannellini, and pinto or black.

1 can diced tomatoes (+ 1 can tomato sauce if you like a soupier chili)

1 tsp chili powder

1/2 tsp red pepper flakes

1 tsp 21 Seasoning Salute (Trader Joe’s)

dash of cayenne

1 bay leaf

1/2 tsp cinnamon (yes, cinnamon in chili!)

couple grinds of salt

1 tbsp olive oil

I recently discovered special chili beans that already have some tomato juice and spices mixed in! Super cool. So this is what I used this time. You can use whatever kind of beans you want.

IMG_0812

I use a large stock pot for the whole thing. Heat the oil in the pot and add the onion and garlic. Sauté until onion is translucent, about a minute.

IMG_0810

Then add the ground turkey and begin to break up with a wooden spoon. I like the spoon compared to a spatula because it’s more durable. Cook the turkey and continue to break it up until there is no pink left.

IMG_0811

Pour the beans, diced tomatoes, and sauce into the pot and stir to combine.

IMG_0813

This is the line up of the spices I use, minus the salt. I don’t usually measure things out precisely so take note that the measurements above are estimates! Also, I buy a lot of things from Trader Joe’s and the 21 Seasoning Salute is definitely something you should invest in! Its great for chili, burgers, chicken, steak…just about everything!!

IMG_0814

Add all the spices and stir to combine. Then let simmer for about 30 minutes. Serve with a big slice of cornbread or a thick piece of baguette, just something to soak it all up! Enjoy. 🙂

IMG_0816

Lavender Bath Salts

Lavender Bath Salts

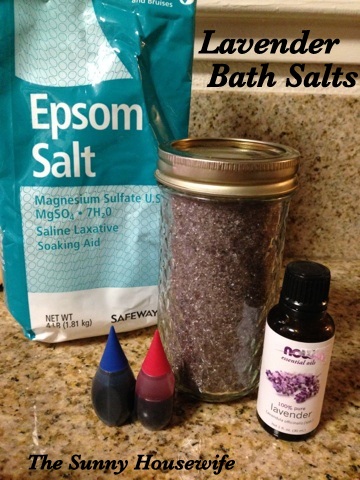
Sorry for the long pause in posts! Life can sometimes get in the way. I am back and ready to delve into my next project for you all. As I mentioned on my Facebook page I have created some tasty (not really, I’m sure they actually taste pretty awful) Lavender Bath Salts for everyone to try! These salts are my all time favorite bathtub addition…other than bubbles, of course! As many of you may already know, Epsom Salts have so many uses & benefits! This “recipe” only takes about 10 minutes total.

IMG_0685

These salts specifically are for use in the bathtub, but Epsom salts have other household and gardening perks too. The benefits from soaking with salts include: easing stress and muscle relaxing, relief of pain and muscle cramps, helps prevent hardening of arteries and blood clots, as well as eliminating toxins from the body, and so much more! The awesome thing about my salts is that they’re made with Lavender essential oil which greatly boosts the relaxation properties.

IMG_0677

So here are the steps….

First, you must decide what you will store your salts in. For my small batch that I made today, I just used and old jar. I filled the jar with Epsom salts just to measure how much I would need. If you’d like you can use a scale, but I was feeling lazy and didn’t want to pull mine out. The scale would be useful if you’re making a large batch and don’t want to pour salts all over the place.

IMG_0678

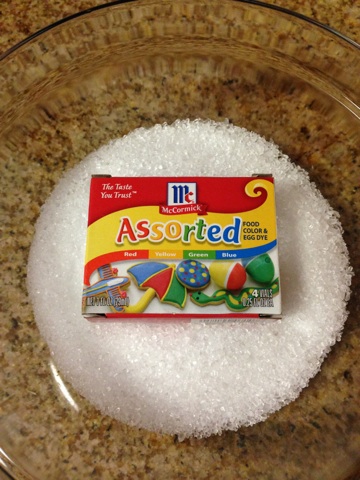
Anyway…I dumped the salts into a medium bowl. I chose glass because it’s easy to clean. I always add food coloring to give the salts a pretty color. In this case I made the salts purple to go with the Lavender theme. Food coloring is not harmful to your body, but it can sometimes turn your bathwater a different color! At any rate, food coloring is optional (but highly recommended!). I just use some typical McCormick food coloring, any kind you find in the baking aisle is fine.

IMG_0679

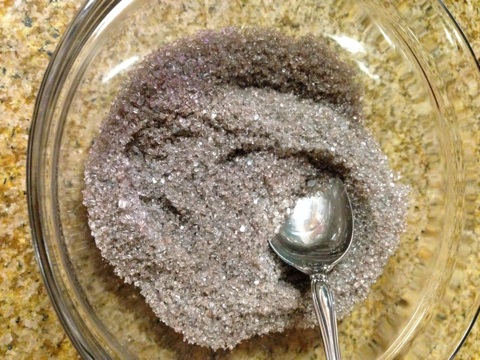
I usually follow the directions on the box that’s labeled “White Icing”. In my case it called for 12 drops of red and 8 drops of blue to get purple. I usually end up adjusting it a little to get the color perfect…I added 2 more drops of red this time. *Note: the coloring fades over time, so if you end up making purple salts they will probably fade to blue after about a week.*

IMG_0680

Make sure to mix your salts really well to blend the colors. Sometimes you’ll need to take the back of the spoon and smash salts against the bowl when clumping occurs. Just mix until the color is right.

IMG_0682

Then add your essential oil! I added about 20 drops of Lavender essential oil because I really love the strong scent. Add as much or as little as you’d like. It also doesn’t need to be Lavender. There are many great smelling and beneficial essential oils that you could add to your salts. For example, if I’m congested or have a nasty cough I will sometimes make my salts with a combination of Peppermint and Eucalyptus oil. This combination is great to loosen the mucus-y crap in the lungs, it works kind of like Vick’s Vapor Rub! There are many awesome combinations, just look them up and find the right one for you!

After you have finished mixing in the color and oil, you can then start spooning it into your container. I was lucky this time…my spoon fit through the mouth of the jar, but if yours doesn’t just use a funnel! Seal the container and tie it with a pretty bow (or don’t, I just like things to be pretty). I typically use about 1/2 cup in my bathtub.

IMG_0683

In the past I have collected empty liquor bottles, old milk bottles, and miscellaneous jars to fill with salts. The liquor bottles can be particularly pretty and make excellent gifts, just put a little ribbon around the top and you’re in business! When I was a little girl, my Aunt gave me a Chambord bottle full of these salts and told me she made them. I asked her to show me and I’ve been making them throughout the years ever since. One time I made some Aqua-colored Sweet Pea salts and put them in a Milagro tequila bottle, that was really pretty! So get creative and make some awesome salts for someone…or yourself!

IMG_0684

Chicken Rice Enchilada Casserole

Chicken Rice Enchilada Casserole

IMG_0660

For several months my husband has been badgering me to make a chicken enchilada casserole, but his idea of that means layered chicken and tortillas. Personally, I think that when you do it that way the tortillas get kinda hard and it ends up being dry. So I went on a hunt and found this recipe. I kept the general ingredients, but tweaked it a little bit. Prep time: 20 mins. Cook time: 25-30 mins. Total: 50 minutes. Serves: 4-5

Chicken Rice Enchilada Casserole

Ingredients:

  • 2 cooked chicken breasts, shredded
  • 1 box Mexican rice (makes 3 cups cooked)
  • 2 (10 ounce) cans enchilada sauce
  • 1 (15 ounce) can refried beans
  • 2 cups Mexican blend cheese
  • 1 (10 ounce) bag frozen corn (save a handful for topping)

IMG_0650IMG_0654

Preheat oven to 350 degrees. Cook rice according to directions on the box. Shred chicken. I used two chicken breasts, but you could totally use leftover chicken from a whole rotisserie too.

In a large bowl mix together the chicken, enchilada sauce, refried beans, corn, and half the cheese. I highly recommend warming the beans first, if you put them in straight from the can like I did it takes a while to get it smoothly mixed. No need to cook the corn first.

IMG_0655

Next add the rice and mix thoroughly. (The original recipe used Basmati rice, but I wanted the flavor of the Mexican rice so I cheated and went with the boxed kind.) If you’d like to add some salt and pepper now is the time to do it. I found that it had enough flavor from the rice and sauce already, so I didn’t feel the need to add anything else.

IMG_0656

Pour the mixture into a large casserole dish, top with remainder of the cheese, and a handful of corn. Since it’s just my husband and me in the house, I used a medium casserole dish and put the rest into one of my oven safe, glass tupperware dishes to freeze (2 meals in 1!!).

IMG_0658

Place in oven and bake for 25-30 minutes, or until the cheese is melted and bubbly. Serve warm and enjoy!

IMG_0661

Recipe adapted from JoCooks.

Cold Fighting Tea

Cold Fighting Tea

IMG_0649

This week I finally succumbed to a cold that I’ve been trying not to get for weeks. I woke up this morning with a clogged/runny nose and a sore throat. My sinuses are killing me. After rubbing some Vick’s on my throat and chest, I started Googling cold combatives. I found a lot of similar recipes that had honey and cinnamon, others honey and lemon, and some with Apple Cider Vinegar. Growing up my father always made me “Hot Lemon and Honey” which is basically just boiled water with lemon juice and honey added. It’s great for sore throats, but I needed something stronger this time to actually kick this cold.

Usually when I get sick I start popping Echinacea supplements to boost my white blood cell count and fight off the cold. So I took that idea and decided to morph it into something yummy.

I went to the store and bought some Echinacea tea! This way I could drink my immunity booster as well as add all the extra cold fighting ingredients. So here’s the recipe for my tea.

IMG_0648

Ingredients:

  • 1 bag Echinacea tea
  • 1 tbsp thinly sliced ginger (I used a tea ball to steep it)
  • 2 tbsp Apple Cider Vinegar (Bragg is my favorite brand)
  • juice of half a lemon
  • 2 tbsp honey (or more for sweetness)
  • 1/2 – 1 tsp cinnamon
  • just a dash of ground Cayenne pepper (optional)

IMG_0649

Directions:

Boil roughly 1 cup of water (depending on how big your mug is). Put teabag and ginger in mug and pour boiling water over it. Add remaining ingredients and let sit for 1-2 minutes. Remove ginger and teabag…Enjoy! *It may look a little cloudy, this is due to the vinegar and spices. Never fear, cloudiness is normal.*

Surprisingly the tea tastes really good. I know, you wouldn’t think so considering all the weird ingredients, but it’s true! This time I just eyeballed the honey and it wasn’t quite enough, but you can adjust the sweetness accordingly.

I hope that this helps all of you out there who are battling the same icky sickness. Hope you feel better soon!

How to Make Proper Barbecue Chicken

How to Make Proper Barbecue Chicken

plattered bbq chicken Unfortunately I cannot take credit for this wonderful recipe, but it’s just so good that I had to share it with everyone! I have made this BBQ Chicken many times and each time I always get lovely compliments. It is one of my husband’s favorite dishes and I hope it will become yours too! Thanks to the guys over at The Paupered Chef for sharing their expertise when it comes to delicious barbecue chicken! Warning: This recipe is not for the faint-of-heart. Prep time: 20 minutes. Cook time: 45 minutes. Total time: 1hr 5mins.  Serves: About 4

I typically use about 2 packages each of thighs and drumsticks with skin on.

First you must make the “Magic Dust” aka rub. (makes 2 cups)

  • 1/2 cup paprika
  • 1/4 cup kosher salt
  • 1/4 cup sugar
  • 2 tablespoons mustard powder
  • 1/4 cup chili powder
  • 1/4 cup ground cumin
  • 2 tablespoons ground black pepper
  • 1/4 cup granulated garlic (I omit the kosher salt and granulated garlic, and use 1/4 cup garlic salt instead)
  • 2 tablespoons cayenne (or less to taste)

Combine ingredients in a container and mix thoroughly. Keep what’s left in a little tupperware, it’s great seasoning to use on other meats.

To begin, mix up the magic dust and sprinkle it pretty liberally all over the chicken. While you can proceed right away, see if you can plan ahead long enough to let the chicken sit, covered loosely in the refrigerator, for a few hours or even a day. The magic dust has salt in it, so there’s no need to salt the chicken otherwise.

magic dust Then make the sauce.

  • 2 cups ketchup
  • 1/4 cup cider vinegar
  • 1/4 cup Worcestershire sauce
  • 1/4 cup firmly packed brown sugar
  • 2 tablespoons molasses
  • 2 tablespoons prepared yellow mustard
  • 1 tablespoon magic dust (recipe above)
  • 1/2 teaspoon black pepper
  • Hot sauce (such as Tabasco) to taste (I use Cholula or Sriracha, depending on the level of spice I want)

Prepare the barbecue sauce by putting all the ingredients into a small saucepan and bringing them to a boil. Turn down the heat so that it just bubbles a tiny bit and simmer it, whisking once in awhile, until it’s dark and thickened, 10-15 minutes.

To cook: Whether you’re using a charcoal grill or gas, you’ll want to only have one side hot…or “bank the coals”. Make sure your grill is nice and hot before putting the chicken on. Once hot, place the rubbed chicken (no sauce yet!) on the cool side of the grill. The idea is to cook the chicken slowly, which makes for tender, delicious chicken without the charred effect. Put the lid down to build heat and cook for 25-30 minutes. bank coals Make sure to switch the pieces halfway through so that the ones closer to the heat trade places and get equally cooked.Once the chicken is golden and looking close to done (a thermometer should read somewhere in the neighborhood of 150 degrees; by the end the chicken should be up to 165), move the chicken nearer to the heat and start brushing sauce on the pieces, turning often to completely cover them with sauce. Slather it on friends, don’t be shy! bbq chicken This process is lengthy and requires a lot of attention so be sure to hang out in front of the grill, perhaps with a beer, and keep a close eye on your chicken. Try to cook the pieces skin side down as often as you can to keep the meat from charring. As soon as the sauce turns syrupy and caramelized, the chicken should be crisp, you can take them off and put on a platter. Let the chicken rest for at least 5 minutes before serving. Enjoy!!